Cooking New Recipes Daily
Recently I’ve decided to stop eating all processed foods. Aside from items we already have in the cabinet (which I’m slowly phasing out), my diet now consists of locally grown produce, whole organic grains and grass fed/pasture raised meats and dairy. There are a few exceptions here and there but wherever possible I try to utilize the freshest, most high-quality ingredients.
I’ve been searching for the best recipes I can find online that make my local veggies and healthy ingredients the stars. Often times I pour through dozens of recipe versions of the same type of dish to really narrow it down to one I feel confident attacking. These are the ones I have made so far for my #BeBetterGoal challenge – where I decided to cook a unique recipe every day for 30 days. Enjoy!
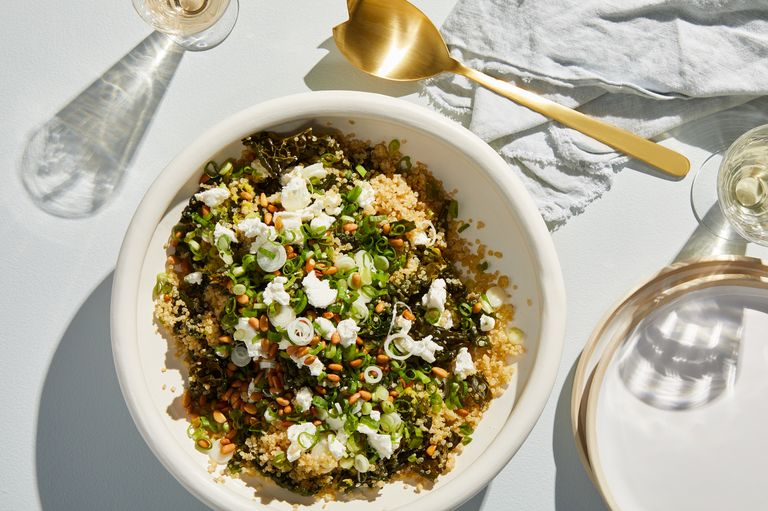
This awesome recipe comes from Food52.com, a great blog a culinary student turned me onto years ago. It’s one of their highest rated recipes with good reason. The main ingredients are Lacinato Kale, Quinoa, Goat Cheese and Meyer lemon. Any kale will all work but the Dino Kale gives it a nice chewy texture. I found it’s still tasty even without the pine nuts and scallions. It’s made all in one pot, which is convenient. If you’ve never had Meyer Lemon, this will make you a fan!
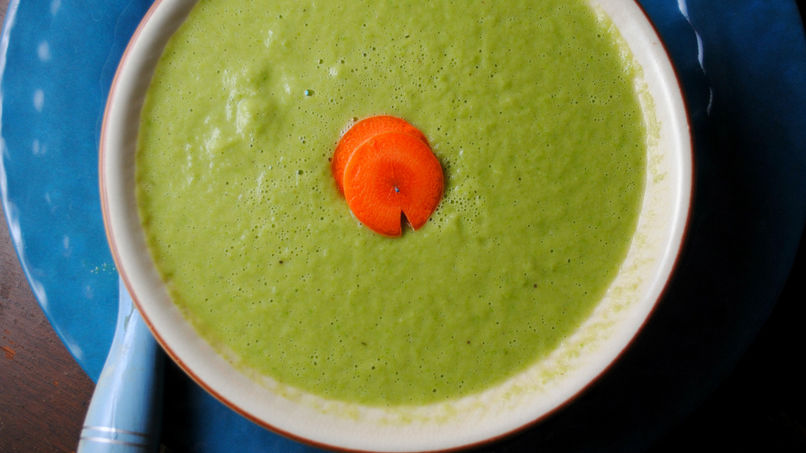
On a quest to utilize a couple nearly expired bags of frozen asparagus, I found this recipe which seemed great considering it was just asparagus, broth and herbs. I also looked forward to using my immersion blender which made easy work of blending everything in the pot it was cooked in. You can use a regular blender and do it in batches but it’s prob a lot more work. This recipe made me excited to realize with the right seasoning you can prob turn just about any vegetable into a healthy, tasty soup!
Note: I found this soup to be very yummy except it had way too much pepper. I’d cut the pepper by at least half.
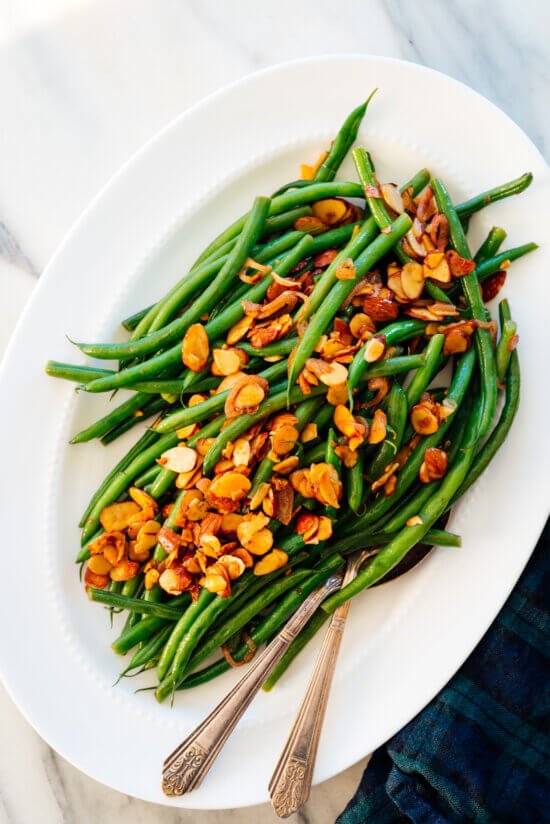
My very first green bean emerged from my garden the other day and I was ecstatic. Though they won’t be plentiful in my backyard for a few weeks now, I was able to snag some fresh ones from the farmers market. Since I have 8 bean bushes, I was on a mission to find the BEST green bean recipes ever so when I’m rolling in beans I’ll know what to do with them! Well this recipe blew me away. It’s from the lovely blog Cookie&Kate.com, which has a ton of great plant-based recipes. I liked it so much that after sharing a little bit, I ate the entire recipe! Who knew green beans could taste so good! (PS: I love fresh lemon so that sometimes influences my adoration for a recipe).
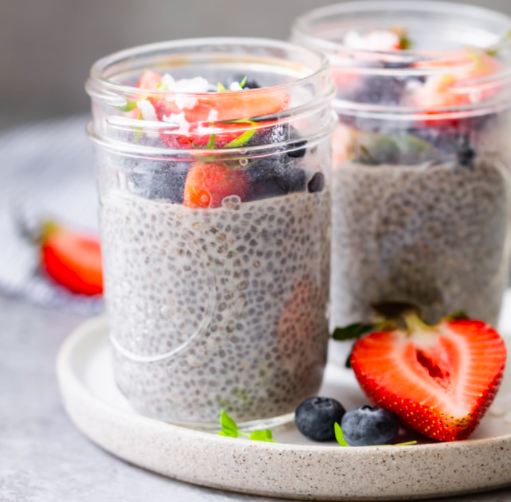
Have you ever had those little premade cups of chia pudding? I really enjoy the unique creamy and crunchy texture it has. It’s like a sweet, plant version of caviar. Yum! For some reason I never tried making my own at home. After buying a HUGE bag of organic chia seeds from Costco yesterday, it was time to see if I could put them to use. I really appreciate that this blogger at FeelGoodFoodie.net provided a simple recipe that took all the guesswork out of making this treat. It couldn’t be easier. Simply mix 1/4 cup milk for each tbsp of chia seeds. Add sweetner to taste (I added a touch of honey and vanilla). Mix a couple times so there are no clumps. Put in fridge overnight and voila – homemade chia pudding awaits you for breakfast! Even my (insanely) picky bf will grab these for a sweet snack when they’re in the front of the fridge.
After reading my blog so far you might be under the impression I’m a vegetarian! Though I applaud people who make that choice for themselves, I’m an omnivore. That said, I’m picky about my meats. Today’s chicken was the best I’ve ever had! I don’t know if it was the quality Cooks Venture chicken I used or this very simple recipe from the iconic Thomas Keller (who cooked 2/3 of the best meals of my life at Per Se) but I may be dreaming of that crispy chicken skin in my dreams tonight.
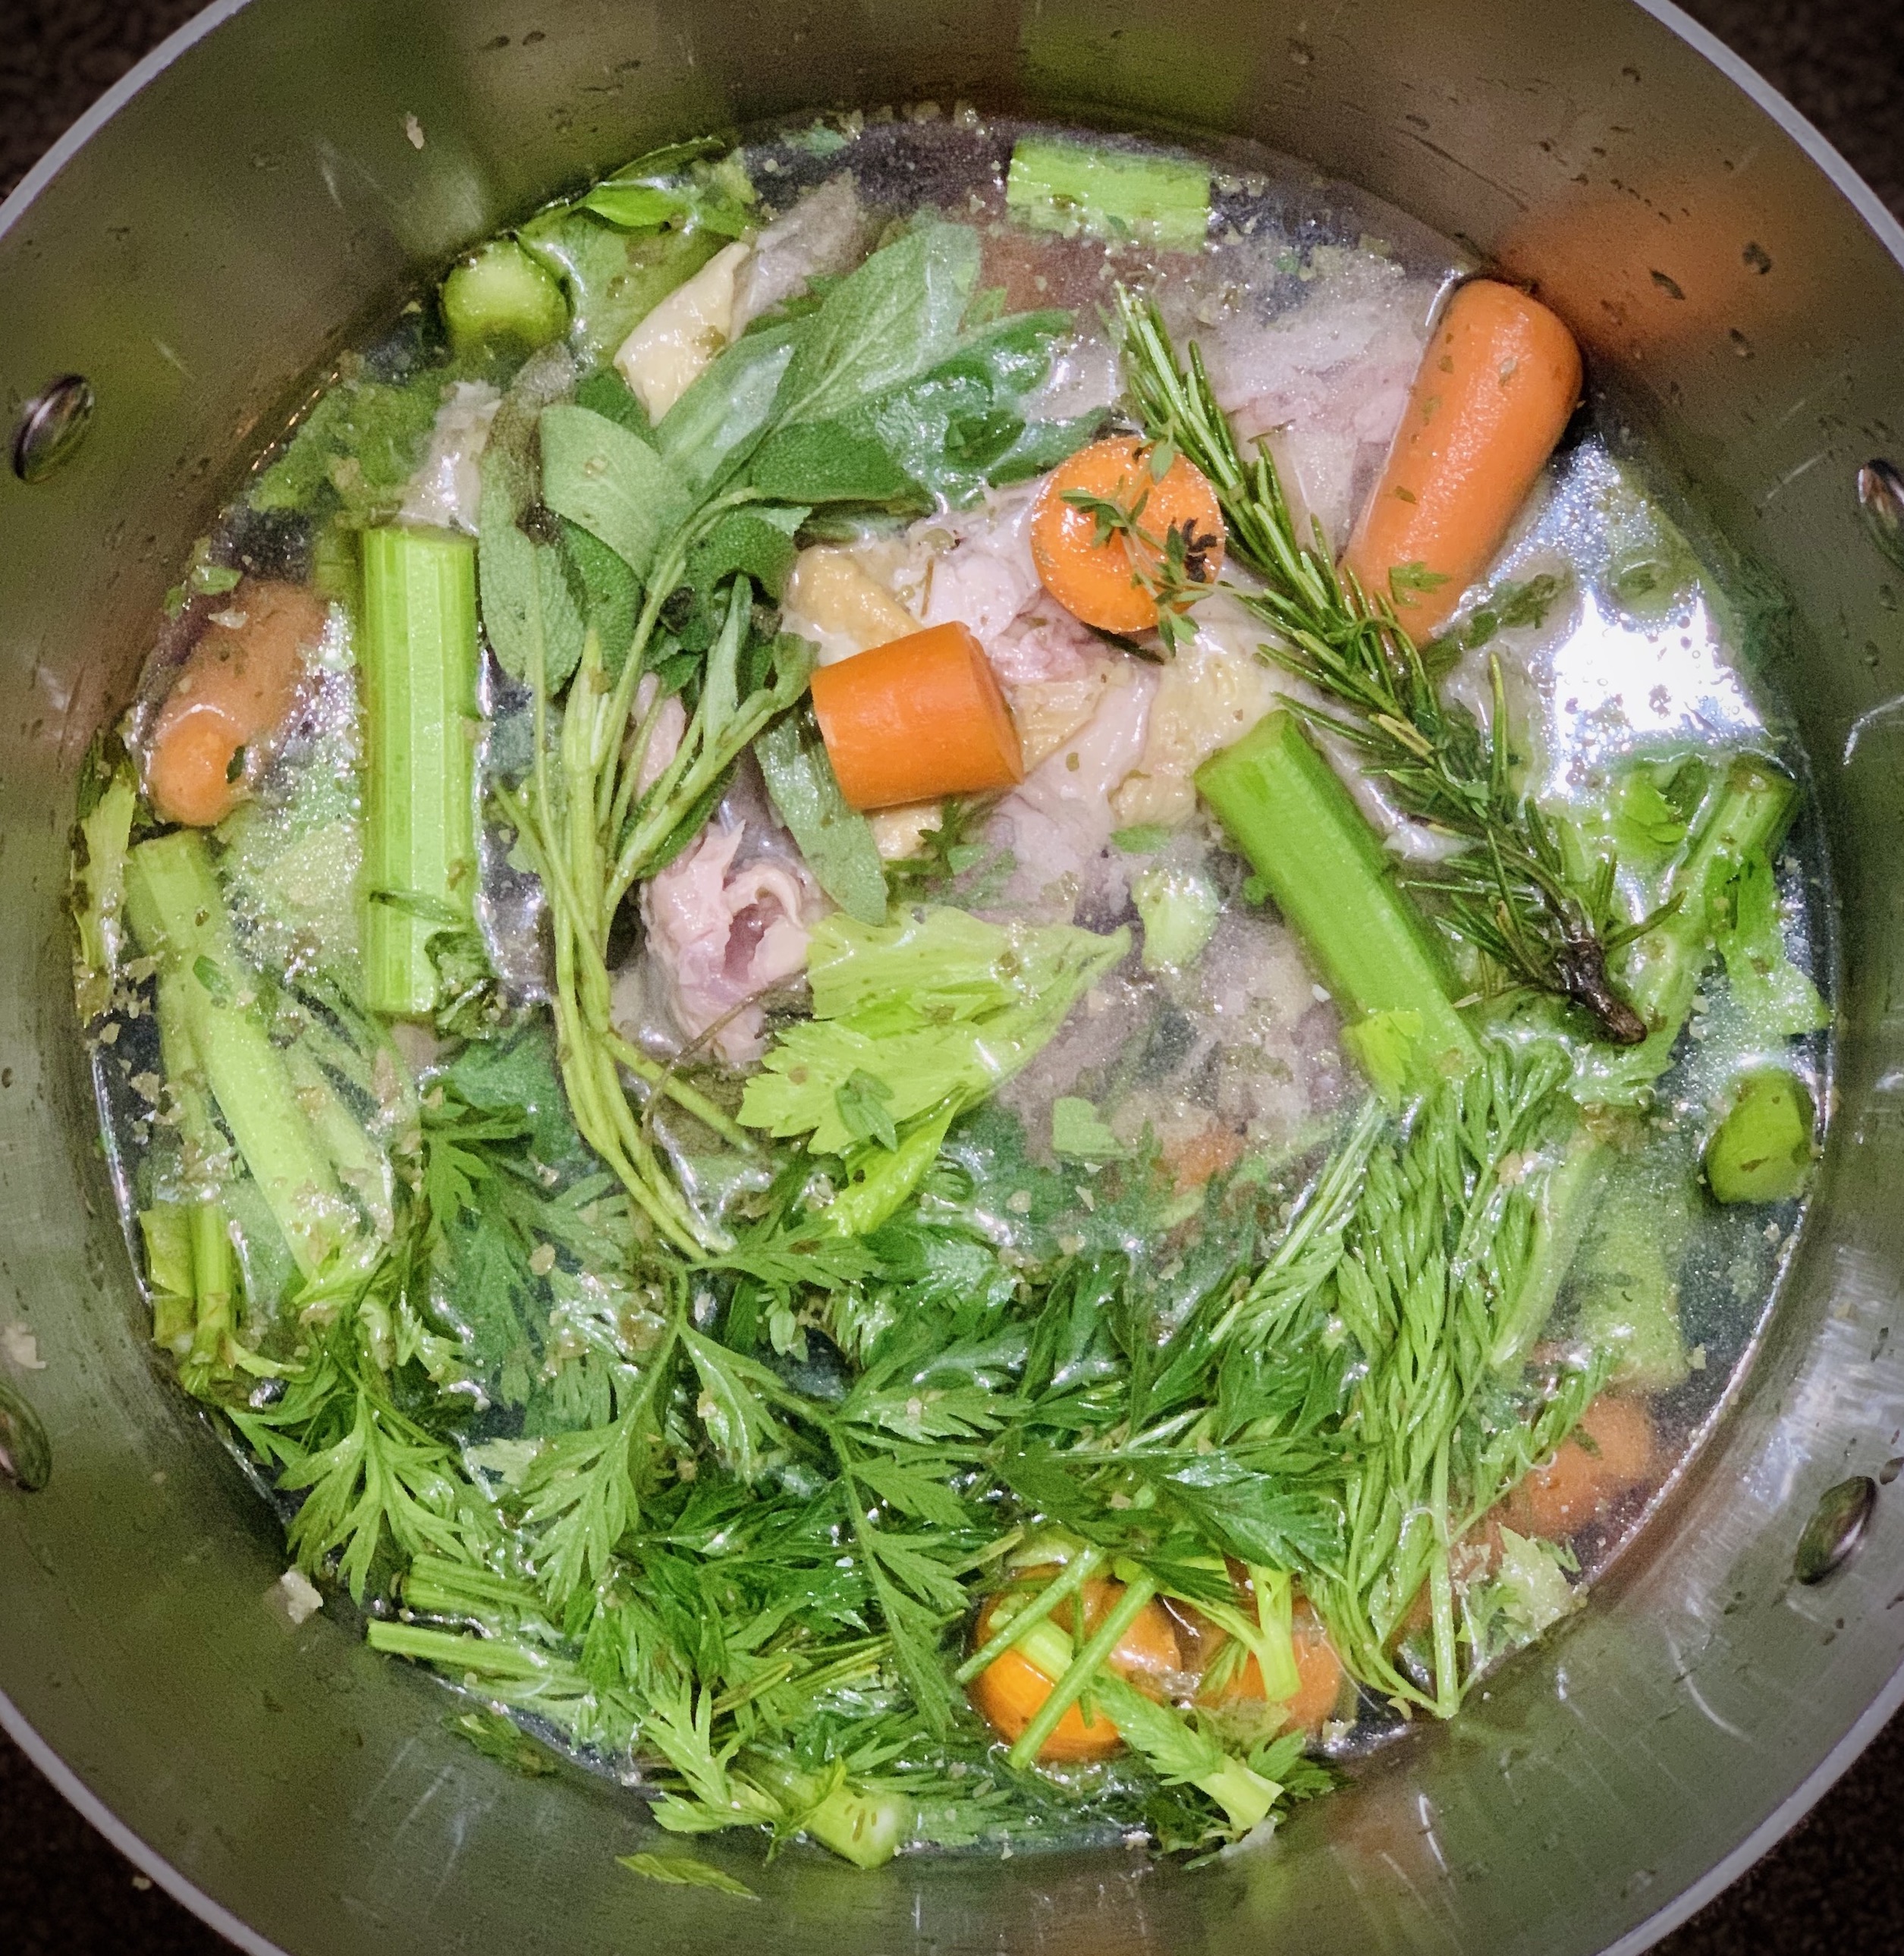
Up until recently I rarely cooked any chicken cuts other than chicken breast, nevermind roasting a whole chicken. Cooking a bird just seemed like so much work – something to be saved for the holidays. Now that I’m sourcing a lot of my food from local farms, it’s more cost effective to buy a whole chicken. To my pleasant surprise, this is easy to make (see yesterdays recipe). Plus afterwards that carcass need not go to waste, but can be used as a base of an easy, delicious chicken stock.
Homemade Chicken Stock:
1- Put a large pot on the stove and fill it with all the chicken bones and parts you aren’t going to eat. Add any extra vegetables you have around the house (skipping cruciferous vegetables like kale and cabbage). Most people add carrots, onion, celery and garlic but whatever you have on hand is fine. Add in any fresh herbs you have like sage, thyme or rosemary – and if you don’t have any just put in a shake or two of dried spices. Lastly put in 8/9 black peppercorns. You can skip the salt since you may use the stock in a recipe that will have salt.
2- Fill pot up until water just about covers all the ingredients. Cover and bring to a boil. Lower heat to a simmer. For me this is about a 3 on my stove. Cover but leave cover ajar so that it has some room for steam to escape. Simmer for 2-4 hours. If you don’t simmer long enough your stock won’t develop deep flavor. Too long and it will reduce down too much and you won’t have much stock! I tend to check it after a couple hours to see how the flavor is coming along. Too soon or too long you can’t really mess it up. It’ll just change how strong it is and how much of it you have.
Note: It’s great to add in veggie parts you might otherwise throw away like the bottom of a celery stalk or the tops/stems of carrots. Anytime you have these scraps, clean them, loosley chop em and throw them in a ziploc bag that you have in the fridge or freezer so you’ll have them the next time you want to make stock.
Day 7: FAIL! Today I tried to make a quinoa pancake recipe. Basically was like an old school banana pancake recipe except with quinoa flour instead of regular flour. I burnt the first couple (the heat was too high on my cast iron) and the rest were a bit too dense for my taste. I’ll be trying a different version of this in the future but won’t post the recipe until I get a good one!
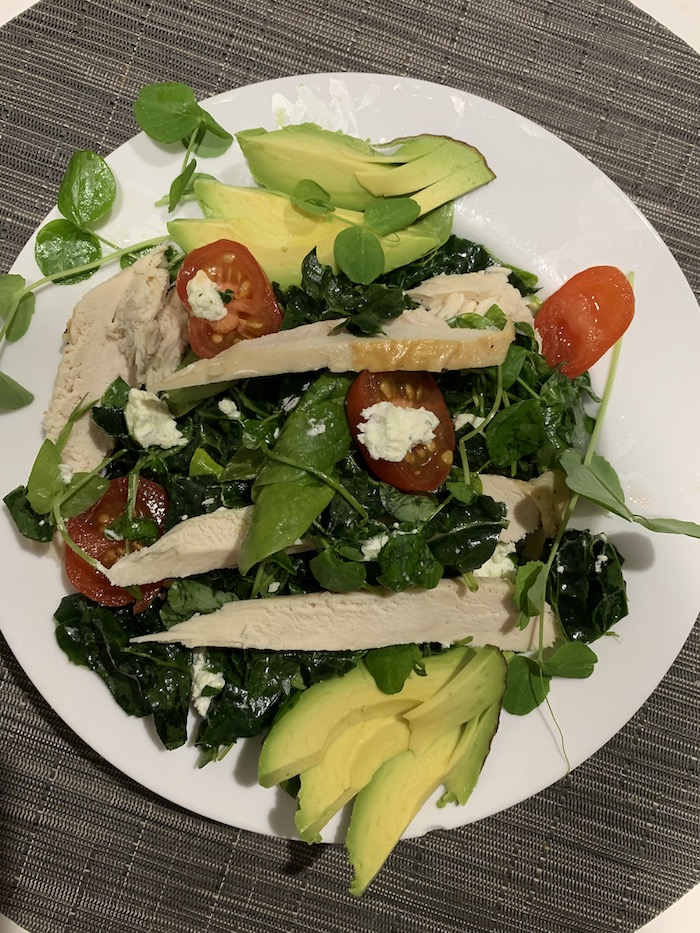
My favorite Farmer’s Market, The Audubon Community Market, is on Monday night. This week I scored an assortment of mixed greens, pea shoots (delicious microgreens that burst with fresh-picked pea flavor), pasture raised goat cheese and fresh tomatoes – all sold by the farmers who grew them. I whipped up this salad to make use of chicken made earlier in the week. The main ingredient is kale. If you’re not eating kale you’re missing out on one of the most nutritious foods you can eat! This is how I made the majority of my salads:
Kale Salad:
- Rinse a bunch of kale off with a spray of warm water (even organic produce can have ickies on it you don’t want to consume).
- Remove the leaves from the ribs. Put leaves in bowl. (You can use the kale ribs in a green juice or throw them in the compost).
- Add 1 tbsp avocado oil & 1/2 of one lemon MASSAGE. The longer you massage, the less bitter the kale will taste.
- Add your favorite vegetables and/or toppings. Some of my favorites to mix in are spinach, avocado, toasted nuts & freshly grated cheese.
- Salt to taste. I prefer grinding coarse sea salt over it. The flavor comes out more than table salt.
- Enjoy!
Day 9: INGREDIENT EDUMICATION: Today it was my intention to make beef stew with farro but most recipes suggested that farro should be soaked overnight so I simply sauteed the chuck steak with some shitaake mushrooms to perhaps make a soup later in the week.
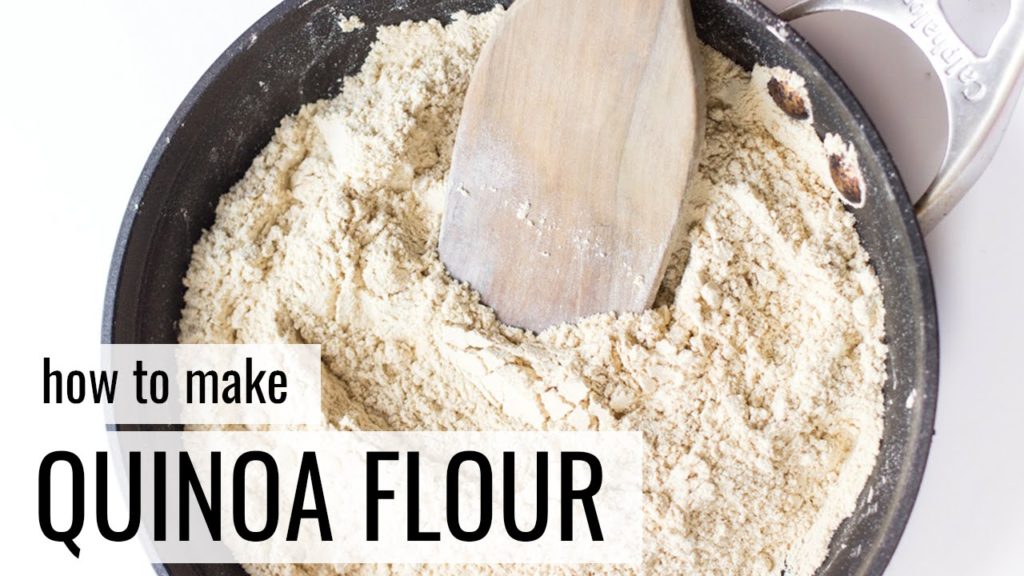
Though it wouldn’t be cheating to buy Quinoa Flour, making my own allows me to not only save money but have the freshest flour for my baked goods. Quinoa flour spoils quickly so grinding my own helps me waste a lot less by making only what I need.
Quinoa Flour: Wash the quinoa thoroughly using a fine strainer. This helps to removes saponin on the surface of the grain, which makes it bitter. Spread the quinoa out evenly on a large baking sheet. Bake at 350 for 15-25 minutes (until quinoa is dry and a bit toasted). Both washing and toasting the quinoa like this will help the flavor be less bitter and more desirable for baked goods. Once quinoa has cooled (you can even put it in the refrigerator beforehand) grind the toasted quinoa in your blender or grinder. Doing so in small batches will probably be easiest. Voila. Quinoa flour.
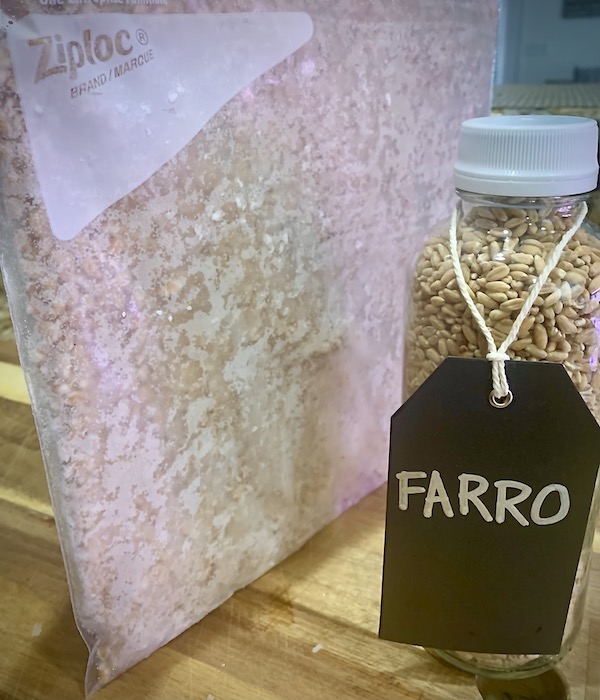
I have SO much food at this point so I’m trying to find more recipes that I can make in order to freeze and use at a later date. Ever want some grains but don’t have the time to cook them? A great solution is to cook a batch of grains ahead of time. Then let them cool then spread in a thin layer in a large ziplock bag. Freeze. This prevents your grains from freezing into a big clump! You can then use as needed or portion out to small containers and have single-size portions ready to go. Mine take just a minute to warm up in the microwave. Much better (and cheaper) than those fast-cooking cups laden with preservatives!
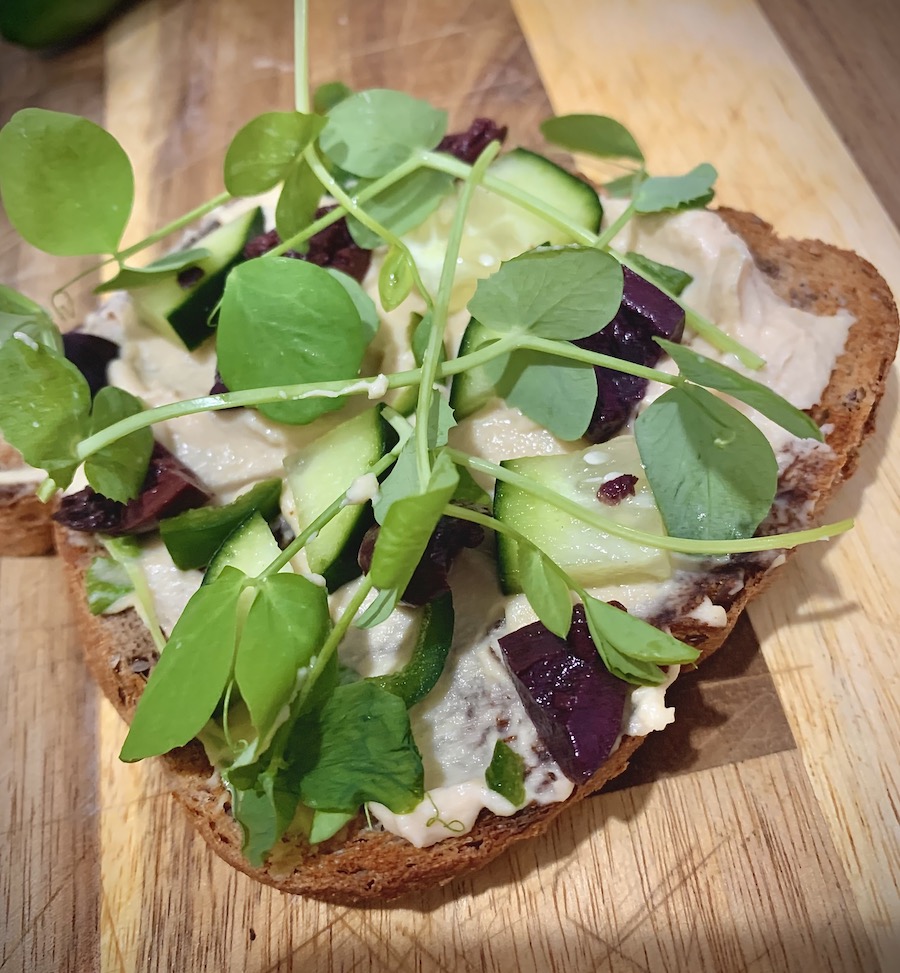
Before the challenge started I bought a huge box of single-serve organic hummus from Costco. It’s been sitting in my fridge getting neglected since I have no pita at home. On a mission to find some uses for it, I found a bunch of great recipes for open-faced hummus sandwiches. What a great idea!
Recipe: Toast some of your favorite bread. I used sprouted spelt. Apply layer of hummus. Cover with vegetables that give a nice variety of flavor and crunch. I added sliced cucumbers, chopped jalapenos, kalamata olives & fresh pea shoots. Also great with avocado, roasted tomatoes and/or toasted nuts.
When I started this challenge I was most excited to make some of the authentic Indian recipes my cousin Monika has in her awesome blog, SavoringFiji.com. These have been passed down through generations and are so much more than recipes. In our family we cook with love and great meals are the cornerstone of cherished family gatherings. My fondest memories are being with my family while eating great food in a room full of positive energy and laughter.
This recipe is a vegetable curry that is super tasty. Serve over some rice for a healthy vegetarian dish. The problem is it’s so tasty you may (like me) keep going back for more! I put the leftovers in single-serving containers in the fridge and freezer meant to last me a while and ended up eating it all the same week!
Day 14: I got an Instant Pot! Every recipe I google these days seems to have an Instant Pot version so I went ahead and made the plunge. I bought a 6 qt version with air-fryer cover (affiliate link). This combines the best of both worlds in a nice size. So far I made perfect boiled eggs (easy, I know). We cooked his son’s nuggets in the air fryer and they came out surprisingly crispy. It’s likely you’ll see a bunch of Instant Pot / Air Fryer recipes in the days to follow!
For Valentine’s Day I made my (very picky) guy a homemade treat I suspected he’d love. Chocolate clusters with almonds. After searching through a few recipes I discovered it was as easy as melting some chocolate slowly, mixing nuts of choice in and finishing with optional sea salt. The key is using high quality ingredients. I used Ghirardelli semi-sweet chocolate chips (after much research the highest lauded chocolate chip for most recipes). Yes, this is processed but it wasn’t for me – OK! I melted the bag of chocolate slowly in a pot on the stove on low heat. When just melted I added in 2 cups of salted almonds. I placed this mixture in clusters on a silicone mat (you can use wax paper) and sprinkled with a dusting of Maldon sea salt which gives a heavenly texture. He said he would’ve preferred them without the salt – but I suspect most of you foodies will adore the sweet/salty combo (very much like Trader Joe’s Sea Salt Dark Chocolate Almonds).
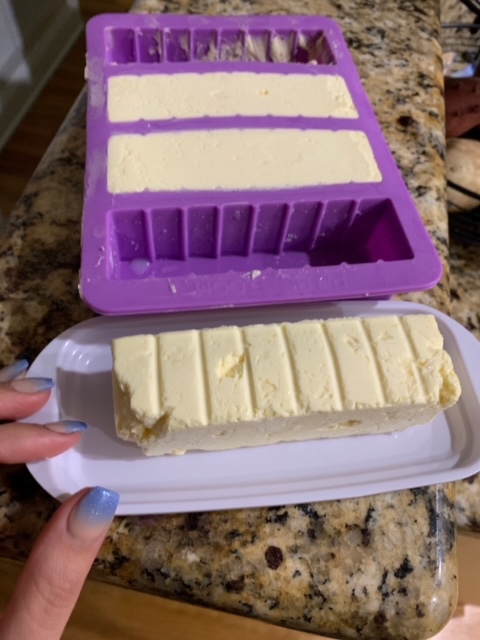
I’m trying to eat all my dairy from local, organic farms that sell raw milk. This has been a challenge for some things like good italian cheeses so I try to eat less of those and more goat cheese & feta deliciously produced nearby. On my last few trips to the farmer’s market my favorite dairy farmer was out of butter yet again. He insisted I could buy his raw cream and easily make butter myself. With no other sources to buy local butter and grass-fed butter costing almost $10/lb I decided to give it a shot.
DIY Butter: In your vitamix put whole cream on high until it starts splashing up on the top of the blender. Start using your tamper to press it down and continue until the buttermilk and butter have separated from one another. Strain over a bowl. Save the buttermilk as it’s a good ingredient for baked goods (ie buttermilk pancakes). In really cold water take the butter and start pressing it out. Do this 5 or 6 times or until the water runs clear. I did not do this step enough times and my butter was a bit more sour than it should have been. Add in a bit of oil if you want to make a softer butter that is more spreadable. Freeze extra as fresh butter will spoil much sooner than processed butter. Add any salt/flavorings that float your boat!
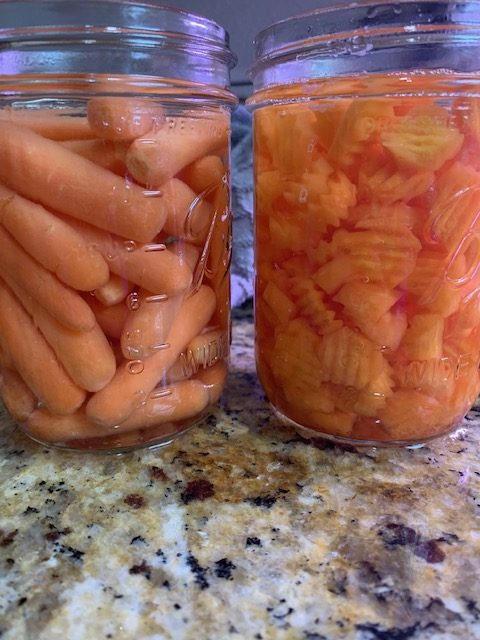
Ever see those jars of mixed pickled veggies called Giardiniera? My mom used to get these all the time and I would pick through them to eat the pickled carrots. I loved how crisp and acidic they were. They didn’t taste like carrots at all (which I otherwise hated). Since I could never find jars of just pickled carrots, I decided to try to pickle them myself. I used the instructions from Almanac.com which seemed to come closest to the Mezzetta brand pickles I loved (just vinegar – no seasonings). I went through all the work to slice some into those little wafter coins that I loved so much but at the end of the day I may just slice them up next time. Just need pickling salt (this keeps the liquid in the jar more clear than regular salt) and vinegar to pickle just about anything!
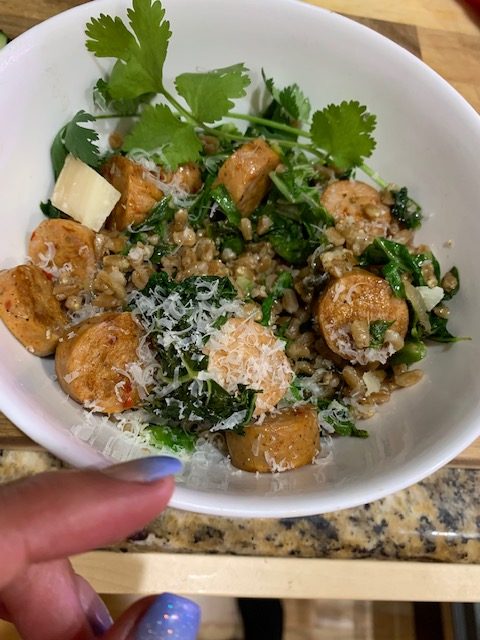
I’m fortunate enough to have a lot of fresh greens growing in my garden just steps away. My Napa Cabbage looks like it could house a whole Cabbage Patch family! One of my favorite ways to use fresh greens in to saute some onions in (homemade) butter on low for 10m then add some garlic for a minute and throw in the greens & pinch of salt. Cook until tender. Then throw in some pre-cooked grains (I nuked some farro from the freezer in the microwave for 1 min) and cooked Bilinski sausage. Finish with some fresh shaved parmesan and herbs for garnish.
Bilinski sausage is the only thing close to processed meat I will eat. Their meat is GAP Certified and the ingredients of the sausage are simply: organic skinless chicken, water & organic spices. They are DELICIOUS and super easy to make. Since they’re precooked (but don’t have that yucky processed nitrate smell) all you have to do is slice them up and throw them on a pan for a minute or two each side. That’s it! You have hot, organic, nutritious lean protein to eat alone or add to any dish. I eat this sausage at least 2-4 times a week and buy it in bulk for the freezer when it’s on sale.
My lifelong bestie, Mary Ellen (aka Meems), suggested this recipe since she knows I’m a blueberry waffle NUT! I have possibly eaten more Blueberry Eggo Waffles than anyone on earth. I’d say for at least 2/3 of my life (likely more) I had at least 2 blueberry waffles every day. Sadly they don’t fit into my new lifestyle so Meems aptly offered an alternative whole-wheat recipe as a substitute. I used whole wheat Einkorn flour, which I’m obsessed with. It came out really good, though the recipe called for a lot of oil – so I may be on the lookout for a recipe that has better nutritional stats for calories/waffle. Especially since I ate 3 servings full after slathering them in butter & honey. Oops!
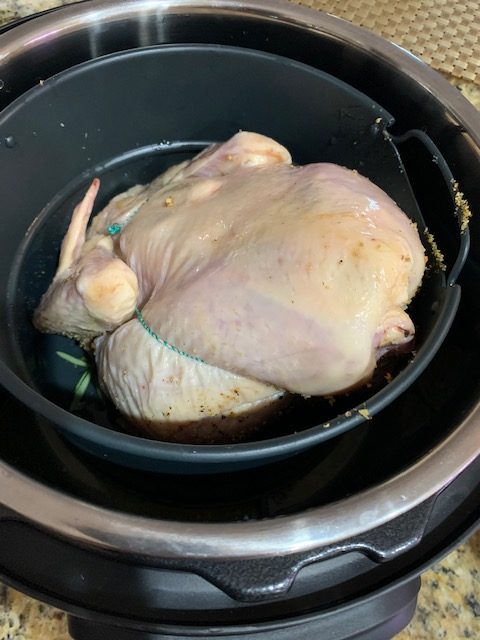
Yes, I already cooked a Whole Chicken recipe earlier in the month. BUT this recipe is meant for the Instant Pot. I wanted to see the difference in taste and ease of something I cooked regularly. How did the Roast Chicken in Oven stack up to the Roast Chicken with Instant Pot (plus Air Fryer Cover)? Well it was easier, faster and took less time in the Instant Pot. That said, nothing can replace that delectably crunchy chicken skin I got on my previous baked version. If you’re not obsessed with crispy skin, the Instant Pot is a no-brainer. PS: Photo is before cooking, it def looked prettier after!
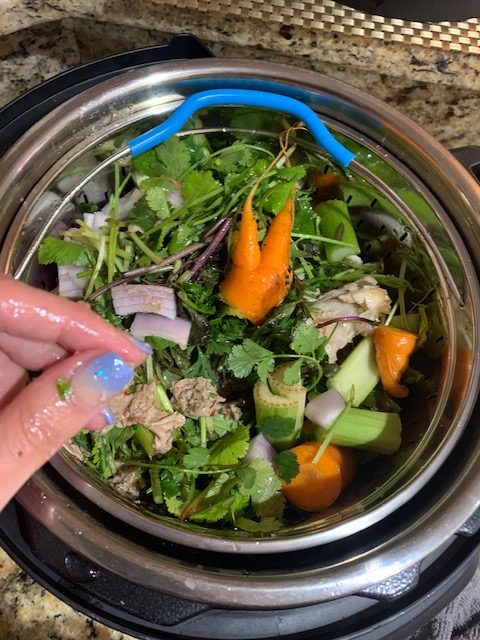
Now that I had compared Roast Chicken in the Oven vs Instant Pot it was time for another battle. How much easier/faster was it to cook homemade broth in the Instant Pot vs on the stove? Well I made a boo boo and kept the drained fat/liquids from my chicken the day before and added it to the broth. I’m not sure why I did this. Brain fart. All good… the broth still came out was just super gelatinous once refrigerated. The Instant Pot definitely won this contest. Not only was it faster than the stove but it was great to put all the ingredients into the steamer basket and simply pull the basket out to have all the stock ready.
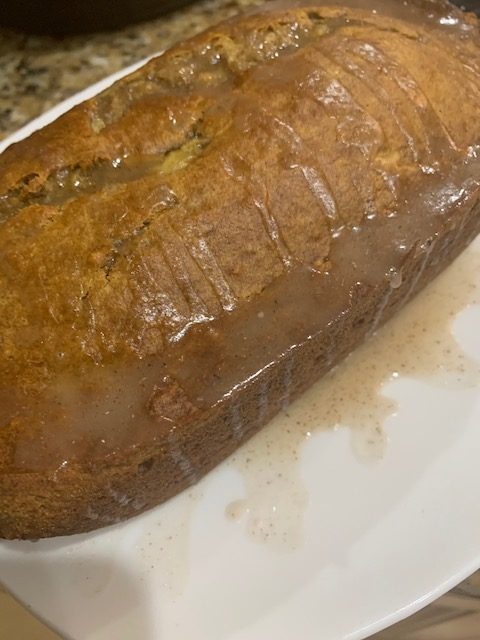
Ok. Stop the presses. This was the most delicious thing I have ever baked. I don’t know if it’s because my taste buds have come to life more after not eating processed foods or if the Einkorn flour agrees with my senses but I found this healthy version of Banana Bread far tastier than the traditional ones I’ve had over the years.
Einkorn is an ancient wheat. Wait, no THE ancient wheat. It is the first wheat that ever existed to our knowledge. Long story short, it is much healthier than today’s wheat which is entirely hybridized and processed. Einkorn is much lower in gluten and carbs and higher in protein and nutrients than modern day flour. Plus it’s delicious and has a nutty, rich flavor! I thought baking with this “ancient grain” was going to result in a heavy, brick-like baked goods but this couldn’t be further from the truth. I actually made this twice in one week after the first one was devoured in two days.
It’s my intention to only eat entirely whole grains that I mill myself. I made an exception with Einkorn flour since Einkorn wheat berries are hard to find and my shipment of them did not arrive in time for me to make a couple of the yummy baked goods I wanted to cook this challenge. The Jovial Foods Einkorn Flour has been great – both the all-purpose and whole wheat. The banana bread above was made from the recipe they have on the whole wheat bag (keep in mind these bags are smaller than regular flour bags so yes they are pricey). I highly recommend them if you see them on sale at your local store! In the meanwhile, I think I may grow my own Einkorn wheat crop. Updates to follow!
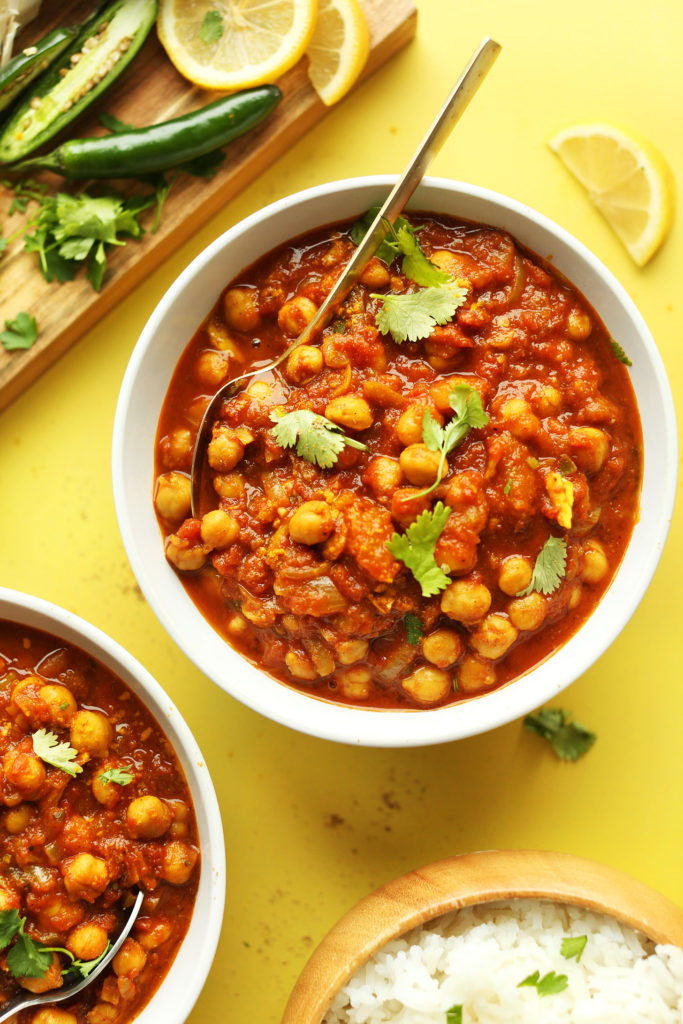
This Easy Chana Masala recipe comes from another awesome cousin, Aradhana (yes I have the world’s best cousins: all sweet, smart, funny & great in the kitchen)! I normally would’ve been daunted by all the ingredients needed but I already had them on hand after Monika helped me find them for her recipes. I cheated a bit and used Garam Masala that’s prob 20 years old – and yet it was still melt-in-your-mouth delicious.
Tbh this isn’t the kind of recipe I’d have much interest in a year ago. I’m not a fan of lentils besides hummus. Or at least I wasn’t. But I find that SO many foods/recipes that seemed boring to me before are now tantalizing because I have healed my tastebuds. With the aroma of fresh herbs, spices, tomatoes and cilantro wafting out of the pot I ate about 1/5 of the recipe straight out off the stove before it was finished! It’s so simple and yet so satisfying. There’s a word in Hindi that I can’t spell or seem to look up – that means “soupy”. This is that soupy type dish whereas the Eggplant curry was not soupy (there’s also a word for this). The thing is sometimes I was in the mood for one or the other – so it was awesome to have two different types of Indian dishes to enjoy from the freezer when the craving struck! I wanted to slather them both on some homemade roti – but alas I have not mastered that challenge yet!
Day 24: Homemade Banana Ice Cream I asked my guy if he was in the mood for anything special. That I would cook him literally anything amazing he could think of. His request? Banana Ice Cream. We don’t have an ice cream maker so after a bunch of googling I determined if I blended frozen bananas, vanilla, whole cream, sugar and milk cubes (freeze milk in ice cube trays) that I could make something close to Banana Ice Cream. This worked and I sort of eyeballed the ingredients being very familiar with the sweetness of the frozen bananas (which by themselves can pretty much make banana flavored treat similar to ice cream if using vitamix).
It came out wonderfully and he was very happy saying it was better than any he’d tasted before (yes, he knows he HAD to say that, haha). The thing is you have to eat it right away for the best taste. You can freeze it and eat it later but it’ll be so hard you have to put it in the fridge for 10+ min to melt it a bit. A solution to this is to add a bit of rum to the mix as the alcohol in the rum will prevent it from freezing so hard.
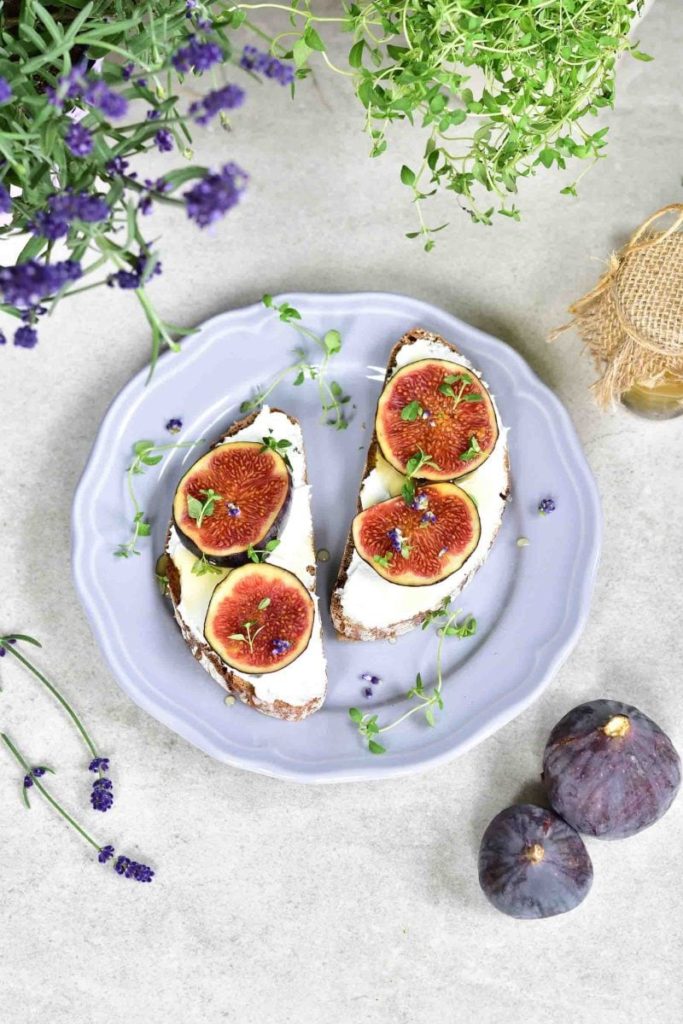
Inspired first by this recipe: Goat Cheese & Fig on Toast I’ve eaten this a TON this month as one of my few sweet treats. Mine’s a bit different. I used organic, sprouted sourdough bread (soon will be baking most of my bread), local raw cinnamon goat cheese, organic dried figs I got at costco cut in quarters and squished, a drizzle of honey and fresh thyme. I’d put lavender but it’s the only thing in my garden I can’t seem to keep alive! This is so delicious and decadent. If you’re into aromatics it will be a great treat!
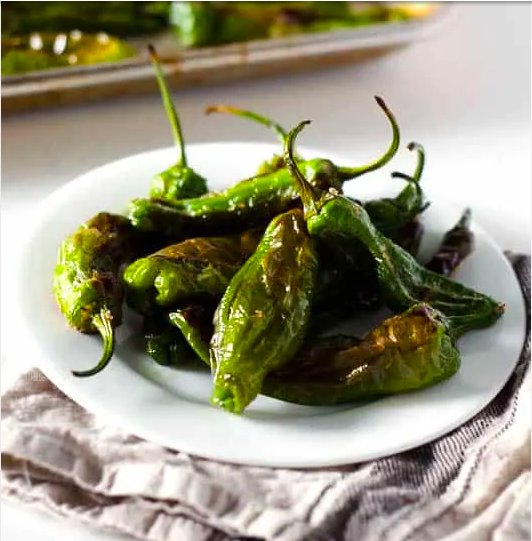
This very simple recipe for Roasted Shishito Peppers def rocked my world. If you’ve eaten at a high-end Japanese restaurant it’s likely you’ve seen these puppies on the menu. They are simply Shishito peppers roasted with a light coating of oil and a generous amount of salt. I often say my hot or “Tītā” tastebuds never grew up. I have never liked very spicy food. These are great because only 1/10 shishito peppers are spicy at all. The other 9/10 are as mild as a bell pepper! So for me, this is perfect. When I pop those salty, roasted yummies in my mouth even if I happen to get a spicy one it’s not that spicy and the rest of them don’t compound to set my mouth on fire. Pair them with a nice dipping sauce (I just mix greek yogurt, lemon and garlic) and you have yourself a crazy healthy treat that popcorn doesn’t hold a candle to.
I like these SO much that I used to buy them 4-5 BAGS AT A TIME from Walmart and pretty much eat them every day. They weren’t organic though and I couldn’t find them organic. So I simply bought some organic seeds and started growing them myself. I currently have 4 full size plants and 3 seedlings in my garden. They’re prolific, easy to grow (here) and make me smile every time I see their little white flowers or better yet their crinkly “eat-me” peppers.
I was excited to try this recipe since we had a ton of extra carrots, I love the taste of lemongrass and I had just planted some in my garden that seemed ready to use. It was surprisingly easy to make thanks to my immersion blender. Though I thought my lemongrass was ready, by the time I peeled it I hardly had enough to use. It definitely needed more lemongrass so I’ve gotta let it grow a bit before making this again. Also, I used greek yogurt instead of coconut milk which made it a lot healthier (calorie wise) but probably took something away in the way of flavor. Next time I will probably blend in some chopped cilantro and some herbs. I used this the next day to trick a kiddo into eating his veggies by slathering it over his noodles like pasta sauce. He gobbled it up and practically licked the plate! #whateverworks.
Eating only the highest quality meats can get expensive. For me it’s justified considering the cost savings of not eating out at all and having a ton of primary ingredients free from my garden or cheap from buying in bulk (like organic grains). Including organic soy in my diet helps me have more meat-free meals that are still high in protein and meat-esque satisfaction.
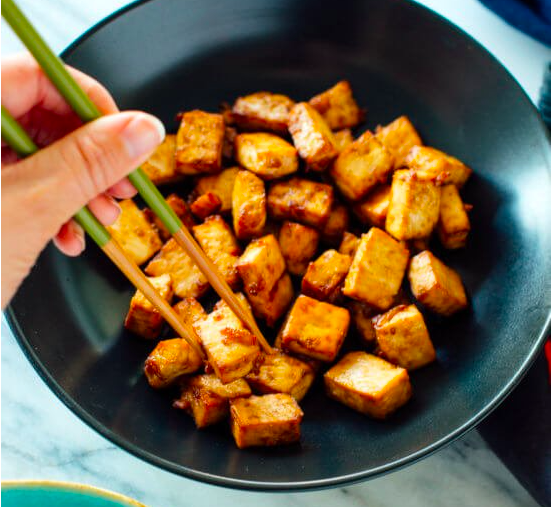
Soy is one of those foods that is controversial among super health nuts. After a LOT of research I came to the conclusion that having soy as part of the diet in moderation is healthier than not IF the soy is from an organic, non-gmo source. I’ll blog about that later. For now, this baked tofu recipe was another great one from Cookie & Kate and the main ingredient in the spring rolls I made the following day. Mine crumbled more than I had hoped so next time I need to do a better job of pressing out all the moisture.
Day 29: Thai Spring Rolls: Thai spring rolls are a delicious, healthy treat. Basically you take Rice Wrappers (now sold at most grocery stores) and soak them for 15 seconds in warm water. Then you put in your favorite fillings (I did crispy tofu, sliced peppers, sliced cucumbers & jalapenos from garden). Then you’re supposed to fold it bottom up, then sides over then top down. But this was easier said than done. These were super tasty and light but I won’t embarrass myself my showing you a photo of them!
Day 30: Panko Parmesan Chicken: This entire month I’ve cooked nearly everything for myself. David is a VERY picky eater and pretty much eats a steak or fast food for every meal. This recipe is the exception. We cooked it a while back as part of a HelloFresh meal kit and he kept cooking it ever since. Though it doesn’t technically fit in my “no processed foods” criteria, I thought after 29 days of cooking I’d let him do the cooking. I’d be remiss if I didn’t include this cause y’all will LOVE it. Super easy and delicious!
Pat dry 1lb chicken breasts. Salt & Pepper. Coat with sour cream or greek yogurt. Mix together 1/4 cup shredded parmesan, 1/4 cup panko, 1 tsp smoked paprika, dash salt & pepper & drizzle of olive oil. Put mixture on top of chicken breasts. Bake at 425 for 15-20m (depending on thickness of chicken breasts – we like to pound them a bit to make them even thickness). Enjoy with your favorite side.
We love this so much we always keep shredded parmesan, panko and smoked paprika in the house that way anytime we get chicken we have everything we need to whip this together. Enjoy!
Thoughts: This month was great. There are still so many recipes I have in the cue like Kaddu, homemade sandwich bread and ton of great recipes from inspired cookbooks I’ve snagged lately (will share soon). I really enjoyed pushing myself to cook original things each day. The hardest part was figuring out how to manage so much food in a way where I didn’t waste things. And doing so many dishes!!
I froze a bunch of stuff along the way and realized that going forward cooking several meals in one day and freezing them in single-size portions will significantly cut down on kitchen work and dishes! Pre-cooking & freezing grains made life so much easier and I can apply that to so many things like prepping baking mixes, spice mixes, cut vegetables and so on.
Hope you enjoyed this post. I know it’s unusual to have a bunch of recipes all on one page. For me it’s infuriating to go to a blog and be bombarded by ads or need to click on tons of pages in order to see content. I wanted to make an ad-free post people could enjoy and click on links to see original content when needed. I really hope more bloggers start prioritizing the quality of their blog over ad revenue! Thanks for reading. Have a great day!
